Introduction
To make a JSGAM adventure you need:
- A basic webpage with a HTML file, a CSS file and a JavaScript file
- Image Atlas for the graphics
- Music and Sounds (Optional)
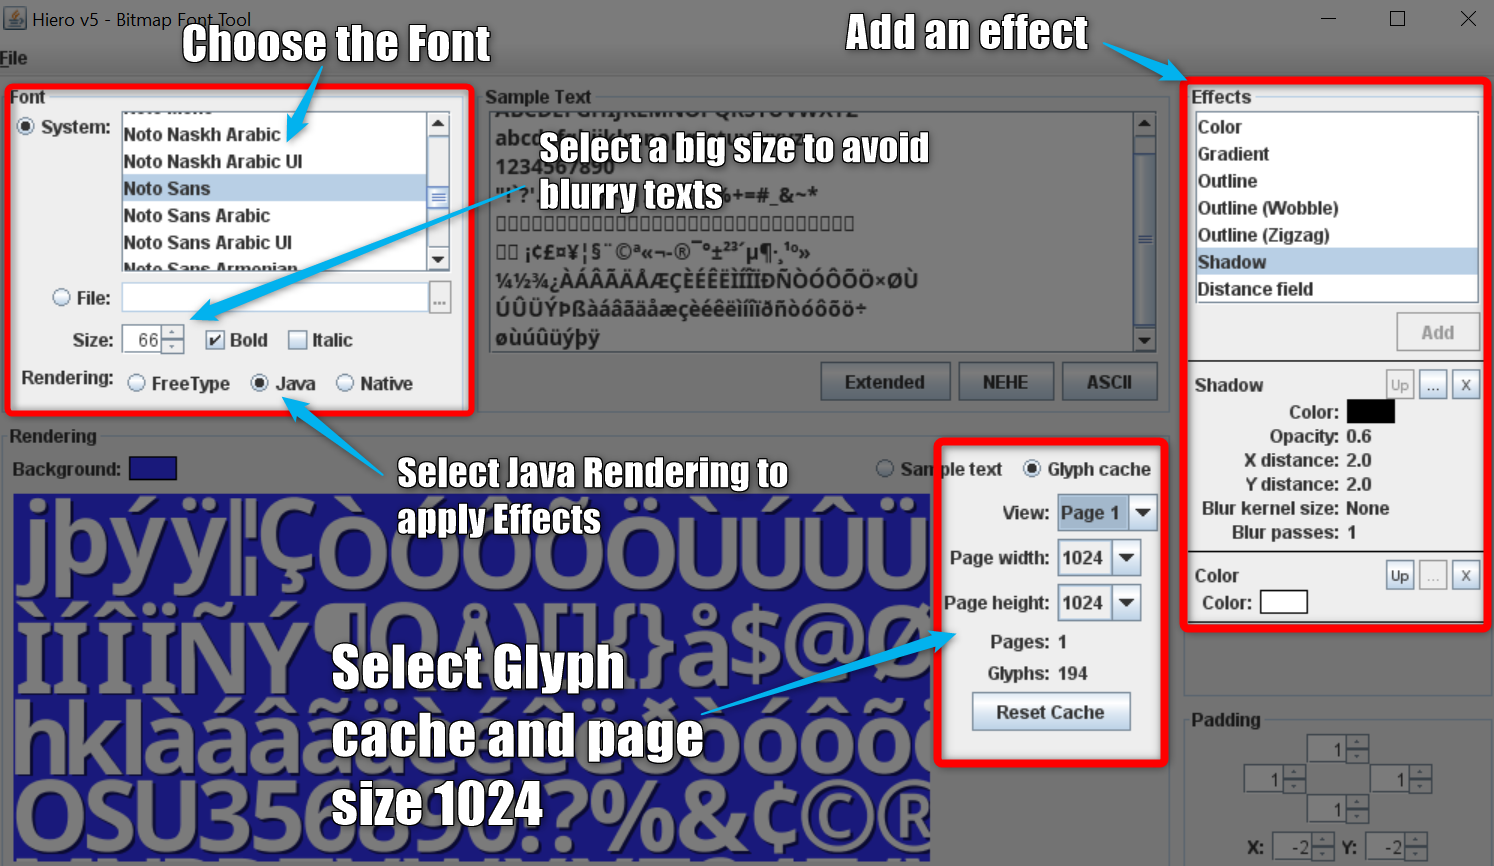
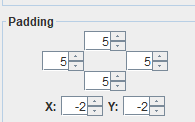
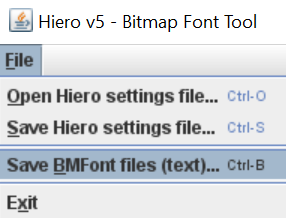
- Angel Code Bitmap Fonts to display text in the game
- A JSON file with the game parameters
Download the resource files used in this tutorial.
Let's start getting the :
Game Template
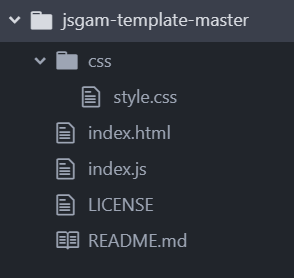
Open the index.html file and modify the title tag inside the head of your HTML.
<title>JSGAM Template Game</title>
Inside the body the important lines are:
<div id="JSGAM"></div>
<script src="https://cdn.jsdelivr.net/npm/jsgam@latest/dist/jsgam.min.js"></script>
<script src="index.js"></script>
The DIV is the game container. The first script is the JSGAM engine and the second is the configuration script.
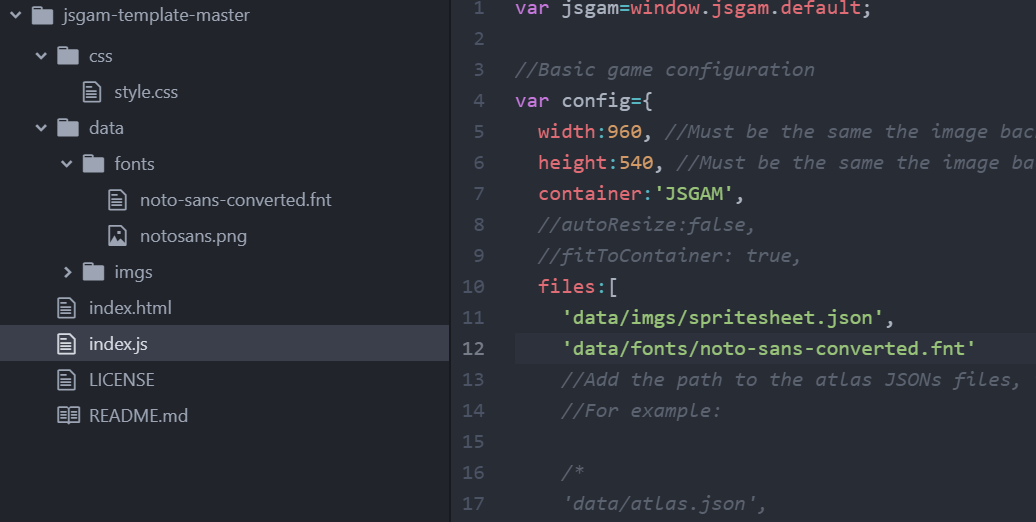
Now let's look the index.js
var jsgam=window.jsgam.default;

//Basic game configuration
var config={
  width:960, //Must be the same the image backgrounds
  height:540, //Must be the same the image backgrounds
  container:'JSGAM',
  //autoResize:false,
  //fitToContainer: true,
  files:[
    //Add the path to the atlas JSONs files, the fonts and the JSON generated with the JSGAM Editor
    //For example:

    /*
    'data/atlas.json',
    'data/font.fnt',
    'data/game.json',
    */
  ]
};

new jsgam(config); //This command makes all the magic
- The
width and height of your game, it must be exactly the same size as background images.
- The
container is the ID name of the div in the index.html
autoResize is true by default, it resizes the game container to fit the browser windowfitToContainer is false by default, it fits the game into the container size.
Set the width and height of the container in your CSS before enable this option.
Also set autoResize option to false.
Files is the array containing all game files (graphics, fonts and game configuration)
In this basic example we'll use:
- A background image, remember the width and height must be the ones you set in your the config file
- An image for a logo
- An image icon for inventory
- An image for inventory background
- A image for an object, in the example a key
You can download the files here
Creating the image atlas
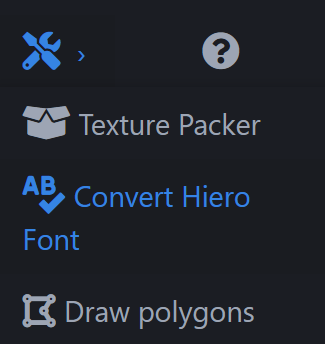
You can use online or offline texture packers.
Use any of two. If you never used a texture packer before try the first option.
Click on the Clear button, drop all images and download the .png file and the .json file

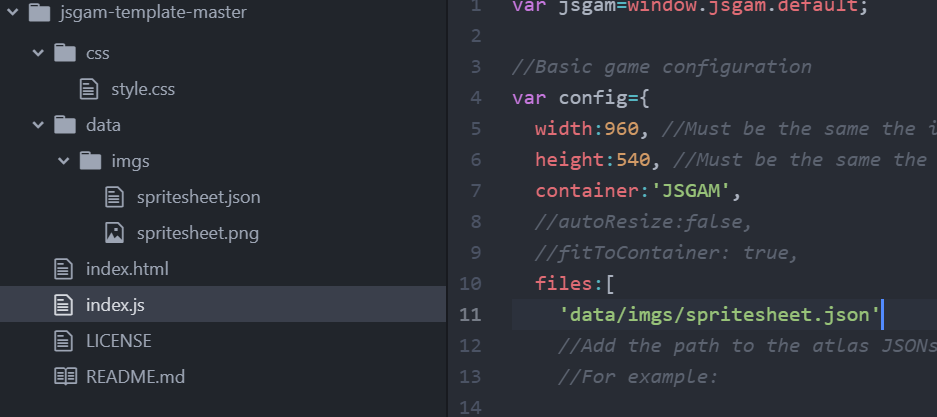
Now create a folder called data and a subfolder called imgs and drop the JSON and PNG files inside.
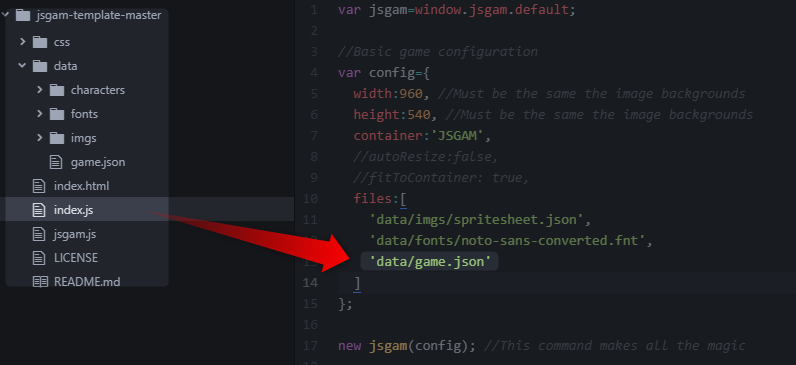
Add the image atlas to the game config, only add the JSON file.
 In this example we only have one character, the player. To make characters we'll use Blender and GIMP.
Download the plug-ins:
COATools
GIMP Exporter:
The coatools_exporter.py should be copied to your GIMP plug-ins folder which is located in:
- Linux: ~/.config/GIMP/2.10/plug-ins
- Windows: C:\Users\yourname\AppData\Roaming\GIMP\2.10\plug-ins
Blender plug-in:
Go to File -> User Preferences -> Add-ons and click the Install from file....
Export from GIMP
Open the character-template.xcf GIMP file.
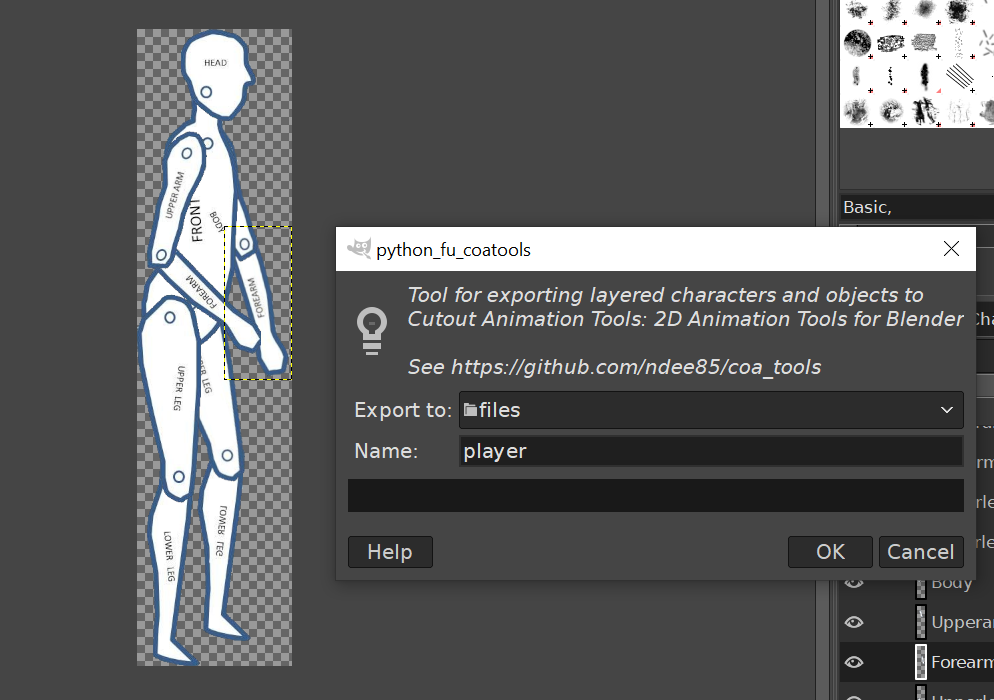
Export to CoaTools File->Export to CoaTools...
We get a folder with a JSON file and a subfolder with the image files.
Import to Blender
Zip the Blender/coa_folder folder
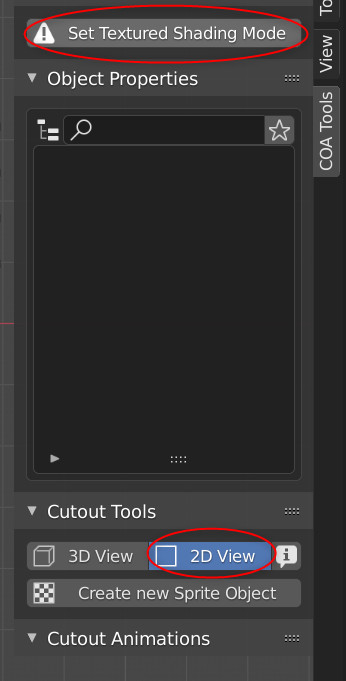
Open Blender, press 'N' key to show the properties panel and select COA Tools.
Click on "Set Textuted Shading Mode" and 2D View
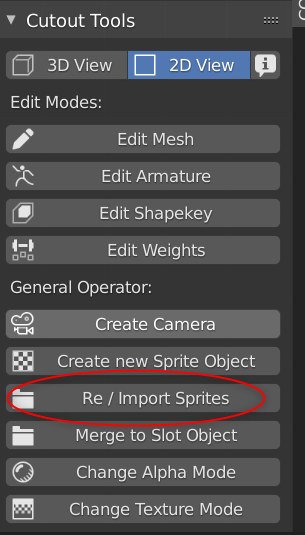
Now click on Re/Import Sprites and select the JSON we exported from GIMP.
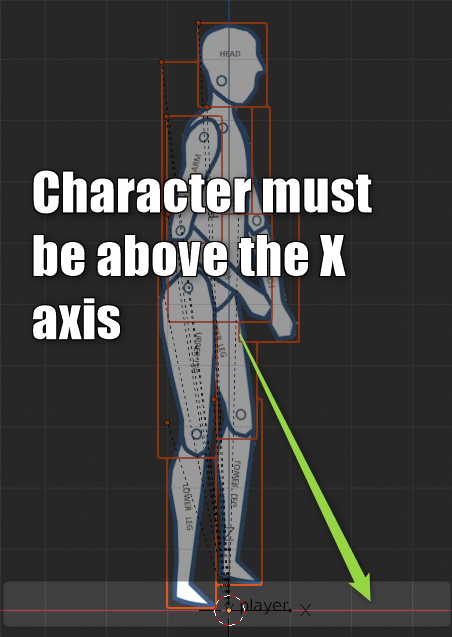
Now press 'G' to move the character and set it above the X axis.
Create the armature
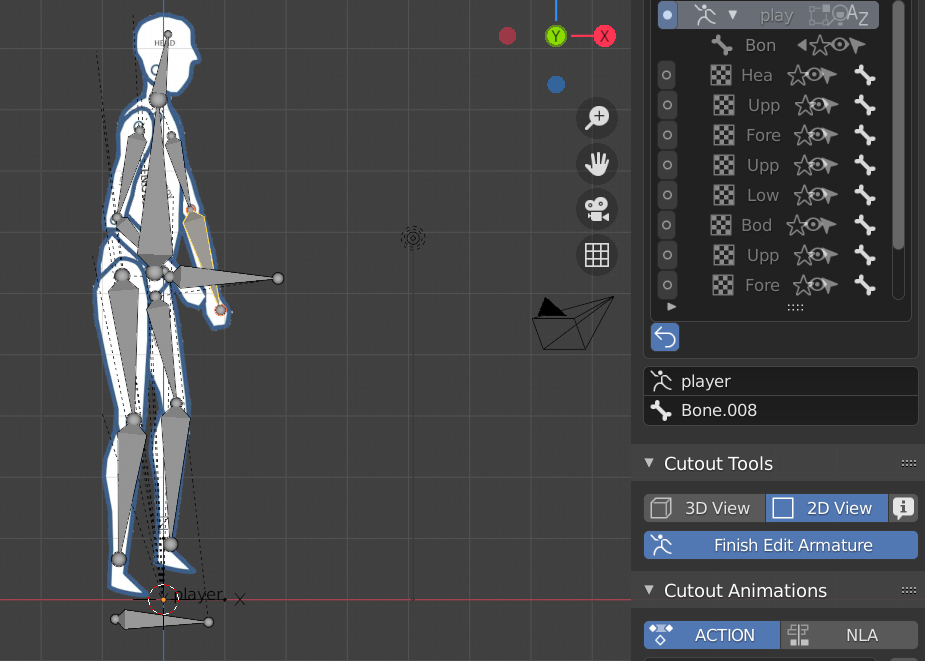
Now click on Edit Armature and create the armature.
The parent bone is at bottom, then we create another bone on the character's pelvis,the body bone is child of pelvis bone.
Below you can see the complete armature structure:
-
'Foot' bone (root)
- Pelvis bone
- Body bone
- Head bone
- Right Upper Arm bone
- Left Upper Arm bone
- Left Upper leg bone
- Right Upper leg bone
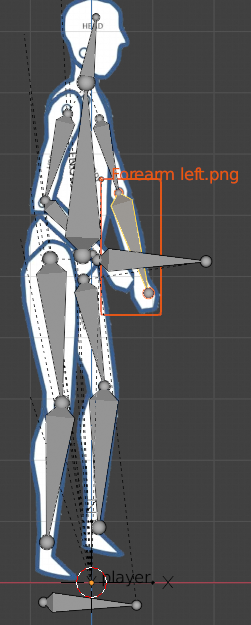
To assign each bone to a body part, while you are in "Edit Armature
" mode, select the bone,
hold on the ALT key and select the body part. Once you are done click "Finish Edit Armature".
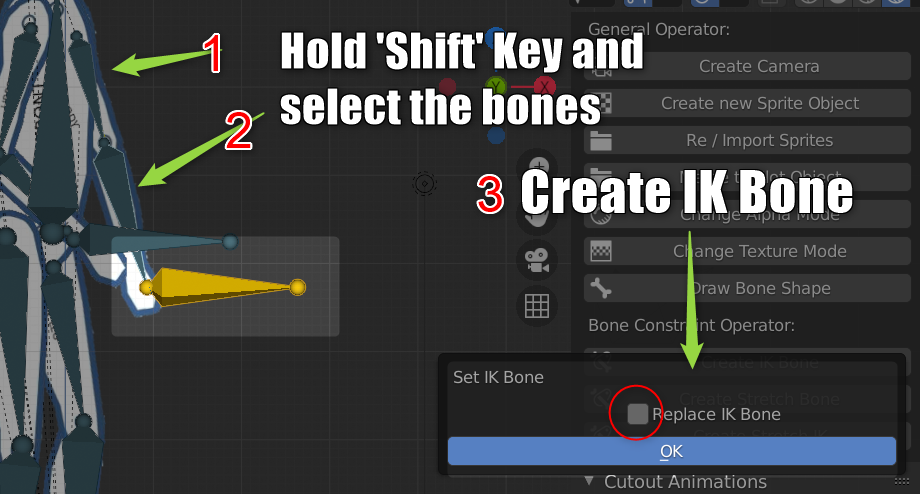
IK Bones are optional but very useful to animate characters.
Click on the
"Create IK Bone" button
Animations
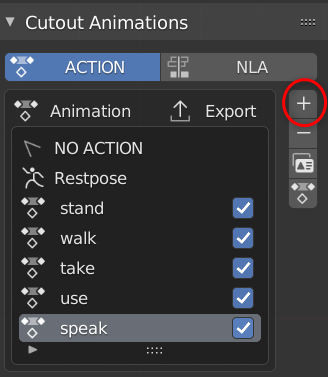
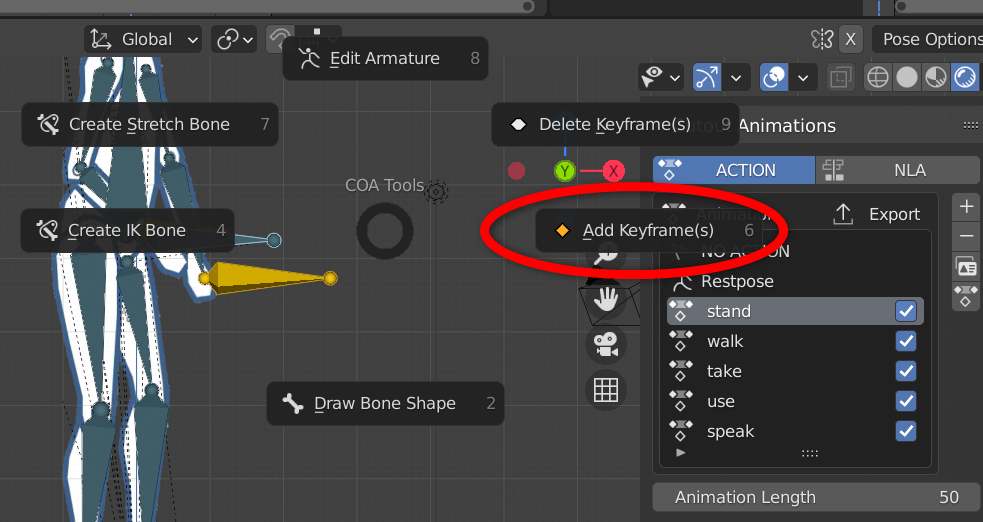
Select the bone you want to animate and press
'F' key.
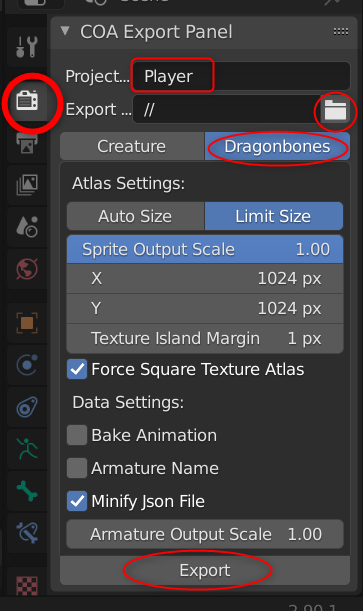
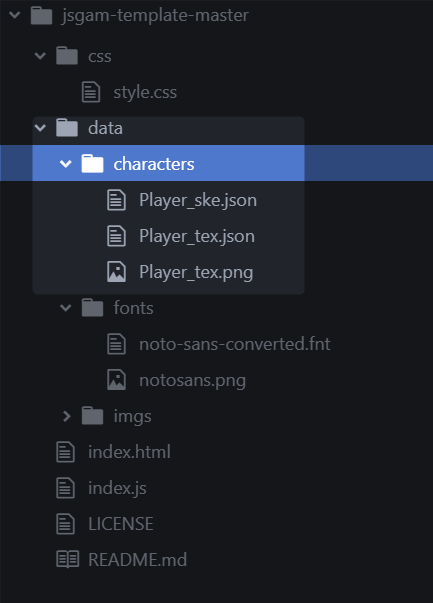
Export the character, we'll get 3 files, move them to the project folder.
Edit the scenes
JSGAM-Tools GIMP plug-in
Download
Copy the jsgam-tools.py in the GIMP plug-ins folder which is located in:
- Linux: ~/.config/GIMP/2.10/plug-ins
- Windows: C:\Users\yourname\AppData\Roaming\GIMP\2.10\plug-ins
You should find it under File>Export to JSGAM... after restarting GIMP.
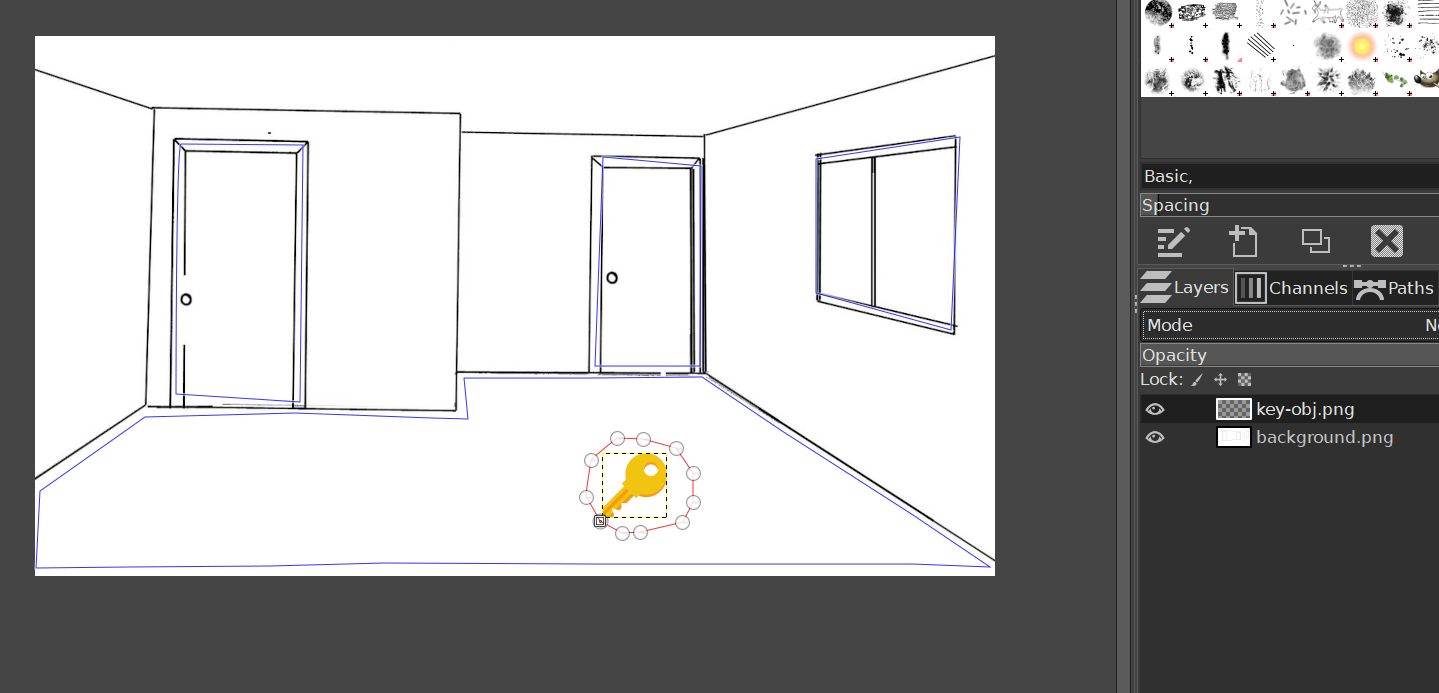
Place the background image at the bottom of the layers, after add the objects, in our example the key.
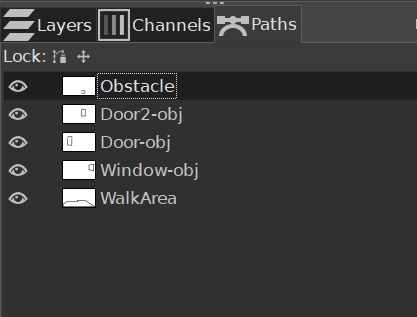
Now define the walk area, invisible objects (in our example two doors and a window) and the obsctales (optional).
Select File>Export to JSGAM... an choose a name, for example room. You'll get a json file.
Making the adventure
Time to make the adventure!
Launch the JSGAM Editor
First we need to import the graphics, fonts, characters...
Import the graphics Import Sources->Images and select the spritesheet.json image atlas.
Import the fonts Import Sources->Fonts and select the noto-sans-converted.fnt.
Now if we go to the Sources tab, we can see the image file names and the font.
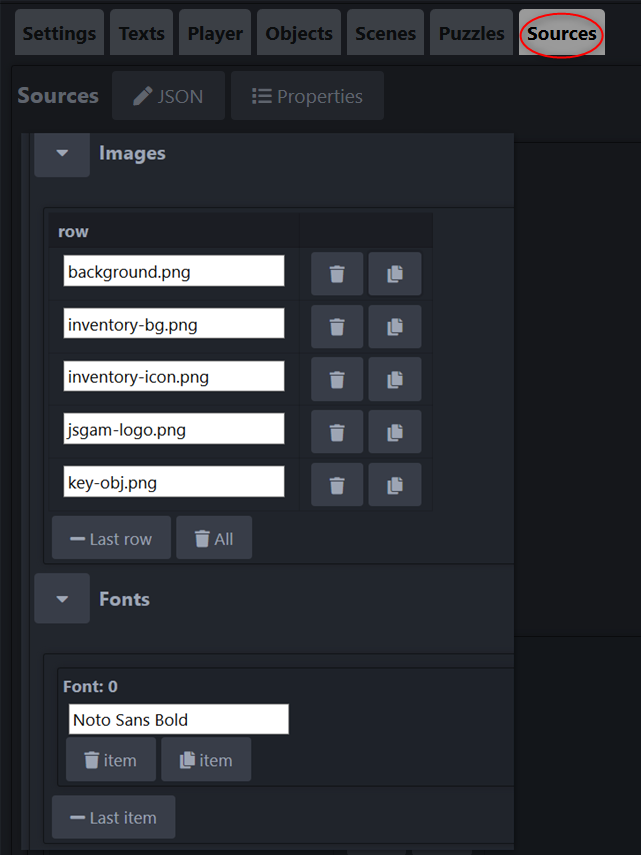
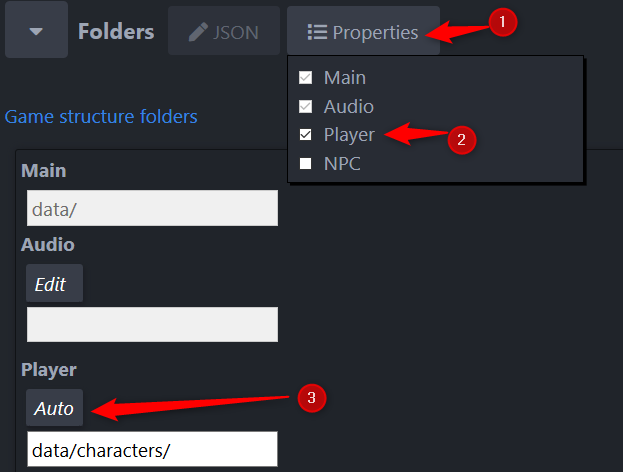
In the same Sources tab, pay attention to the Folders option, here we tell to the engine where are the resources.
By default it's placed in the data folder.
Import the player Import Characters->Player and select the Player_ske.json.
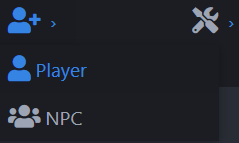
Now if we go to the Player tab.
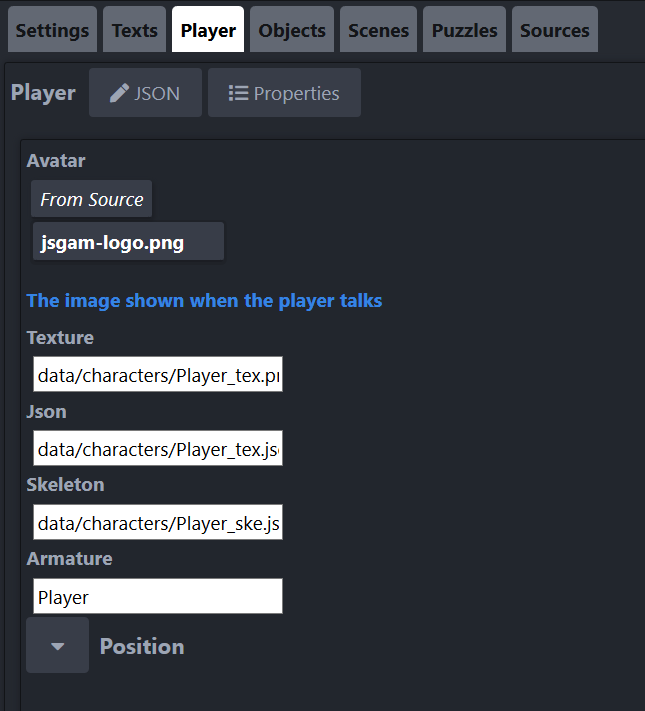
We didn't create a player avatar (the image shown when a character talks), so we'll use the jsgam-logo as you can see in the image above.
The next step is to import the scene. Import Scene and choose the room.json file.
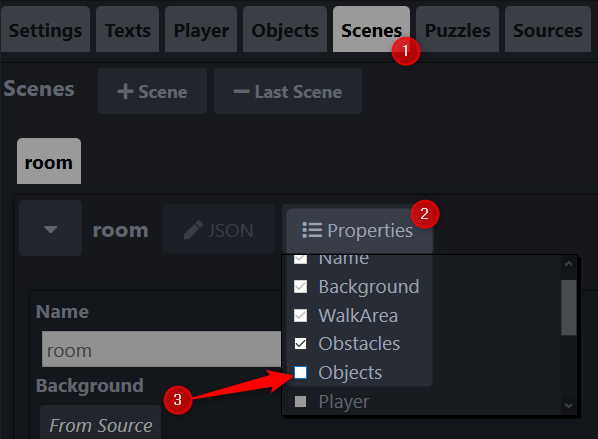
In the current version of the editor when we import a scene it doesn't add the objects to the scene
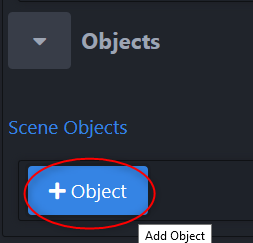
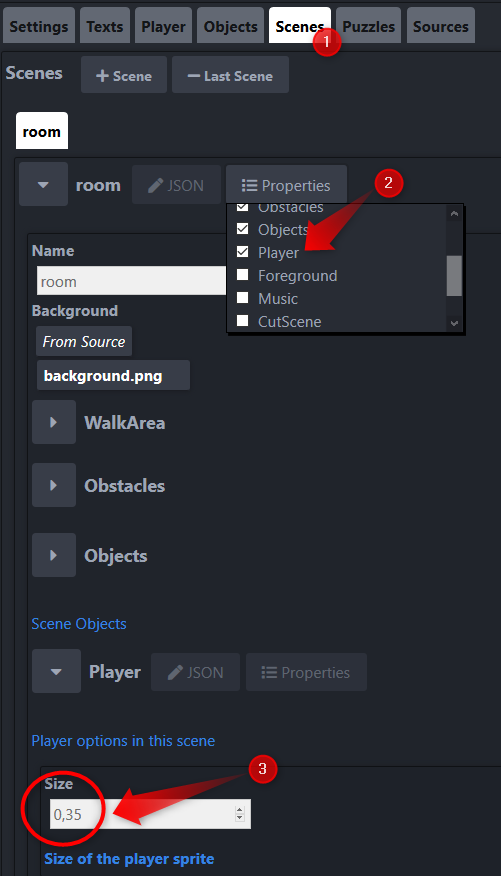
Click on the scene properties and check the Objects then add the objects you want to the scene.
Configure the game
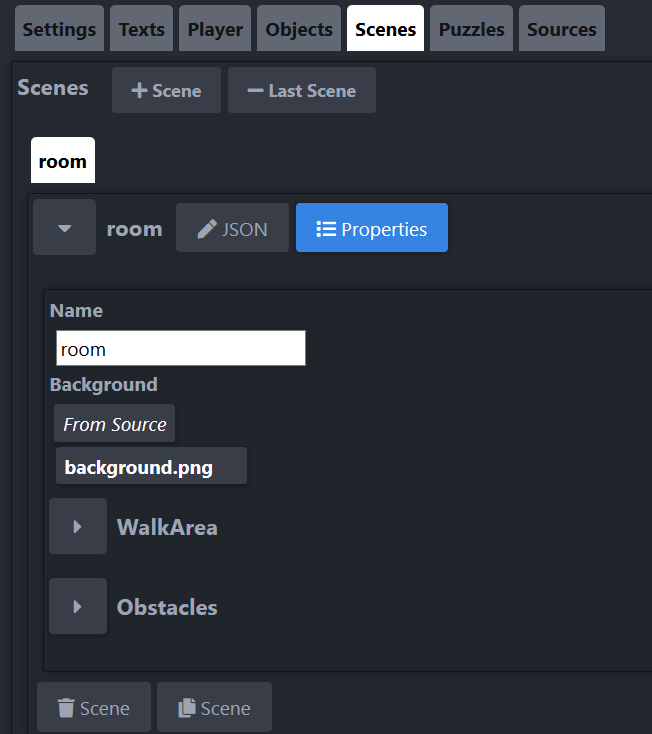
Select the first scene of the game, in our case
room.
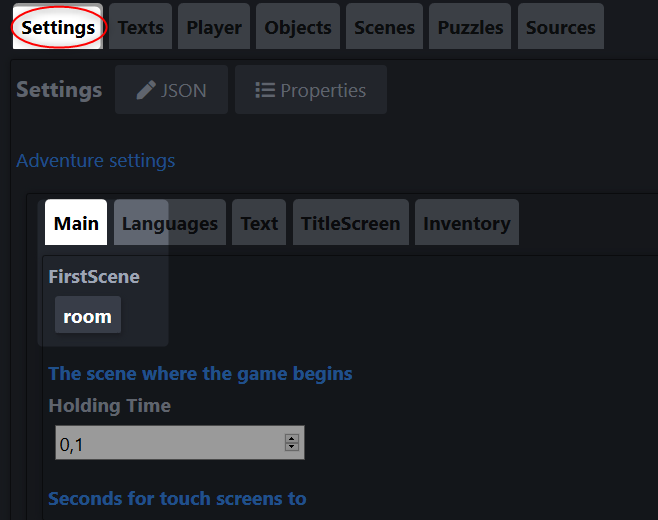
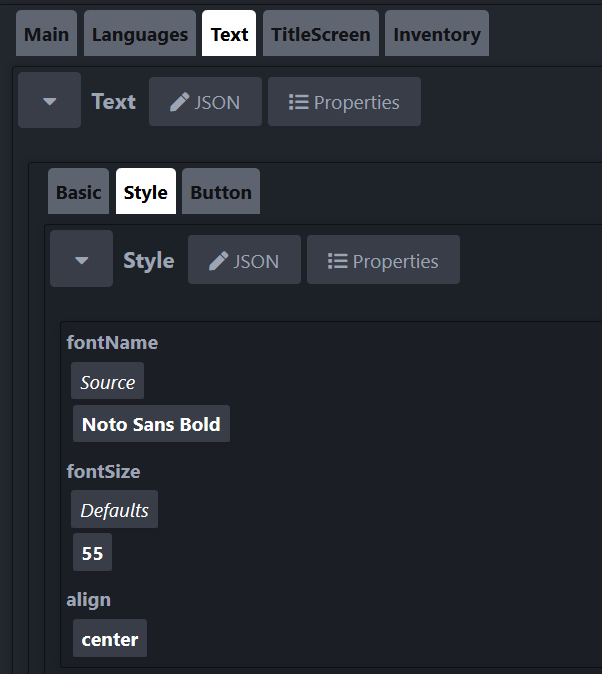
Now select the font for the text and buttons.
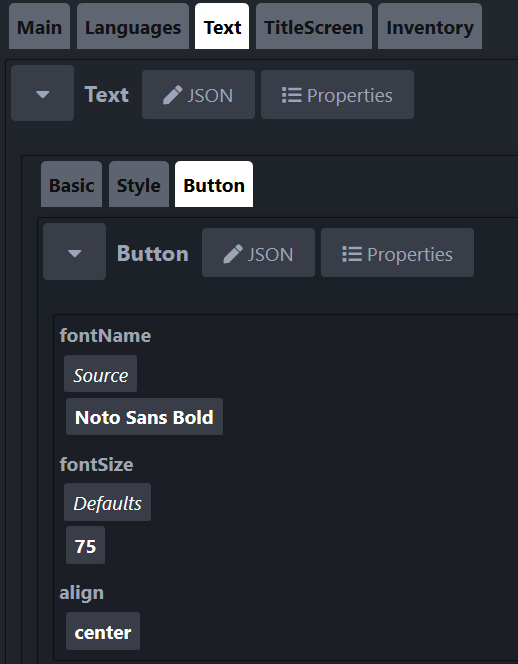
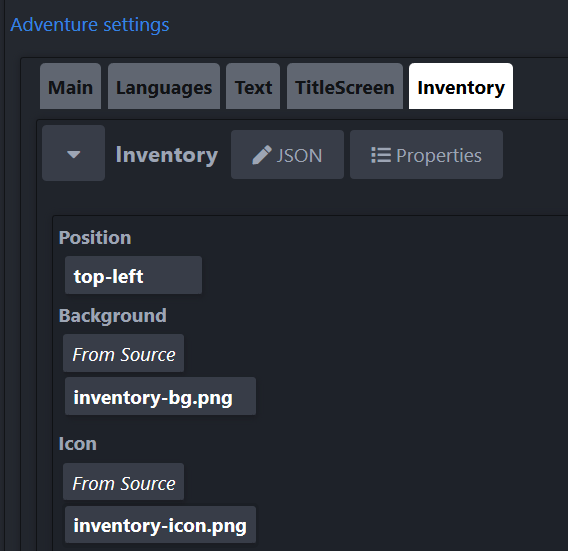
Configure the inventory.
At this moment we can save the adventure and It will work. Let's save the adventure and move the JSON to our project's folder.
We need a local server to test our game. If you don't know how to set up it, please read this.
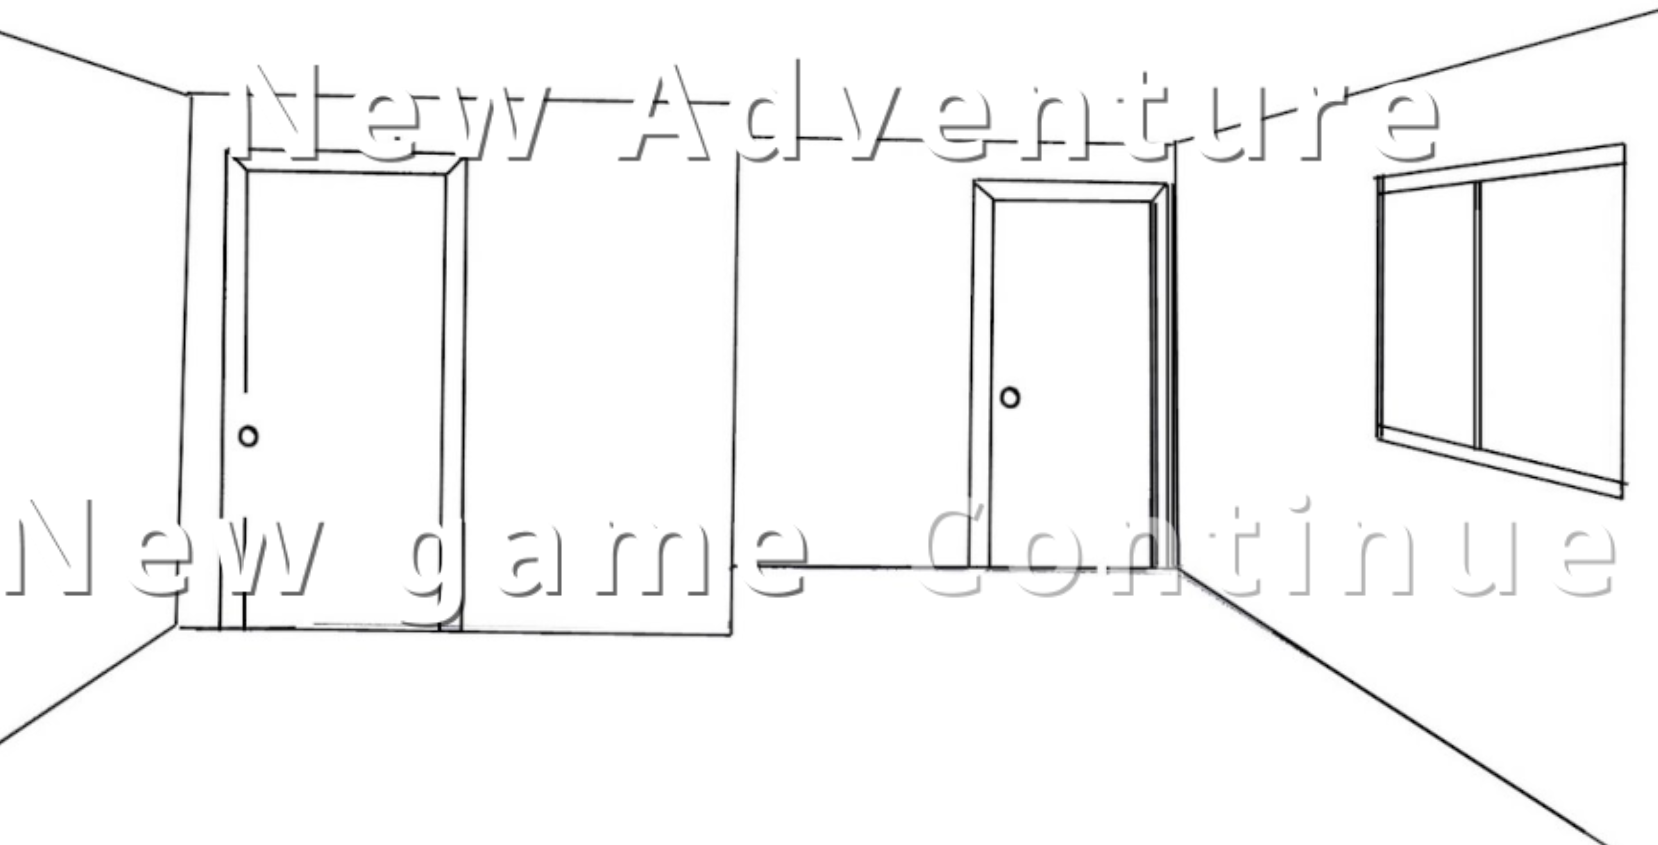
When we run the local server we should see something like this:
We should use another background or another font color for our main title but our objective now is to make a working game.
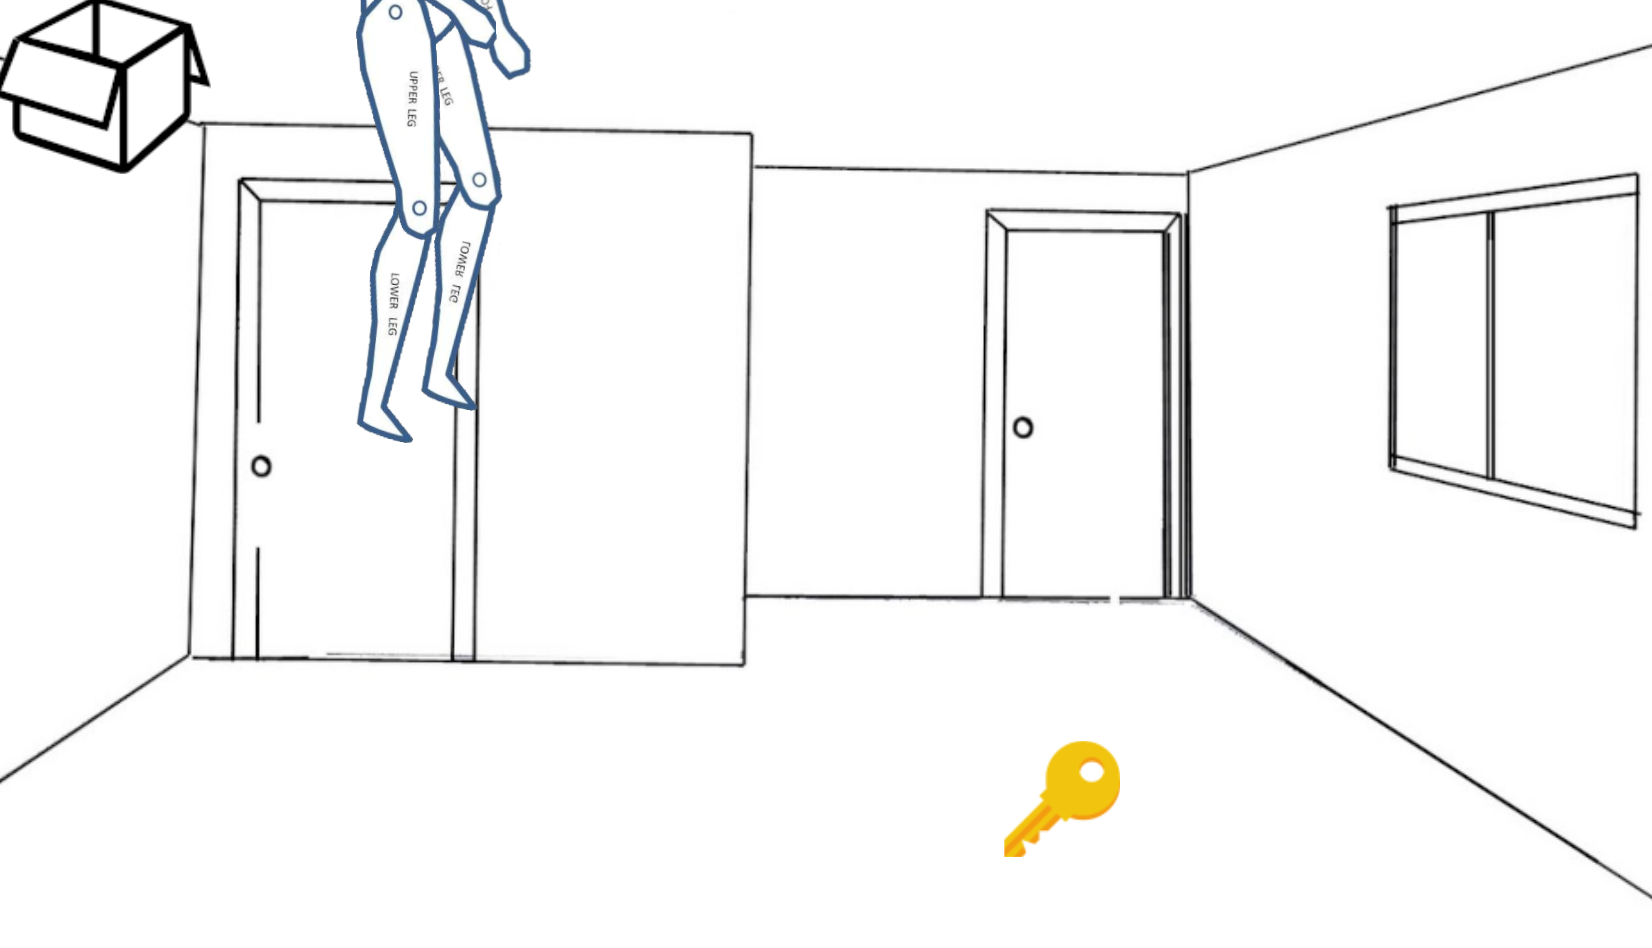
Click on New Game and finally we got something!
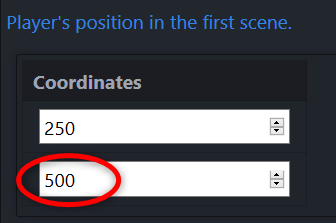
But... not exactly what we expected. Go back to the editor, first we need to fix the player position and size.
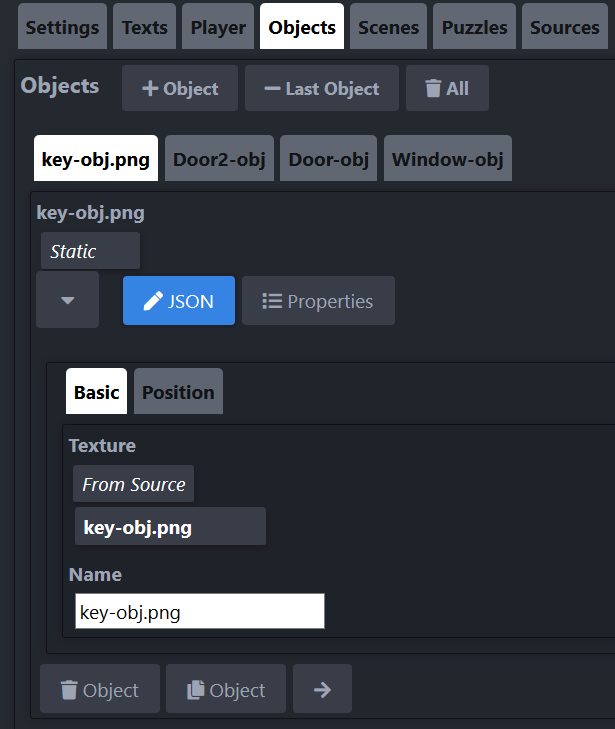
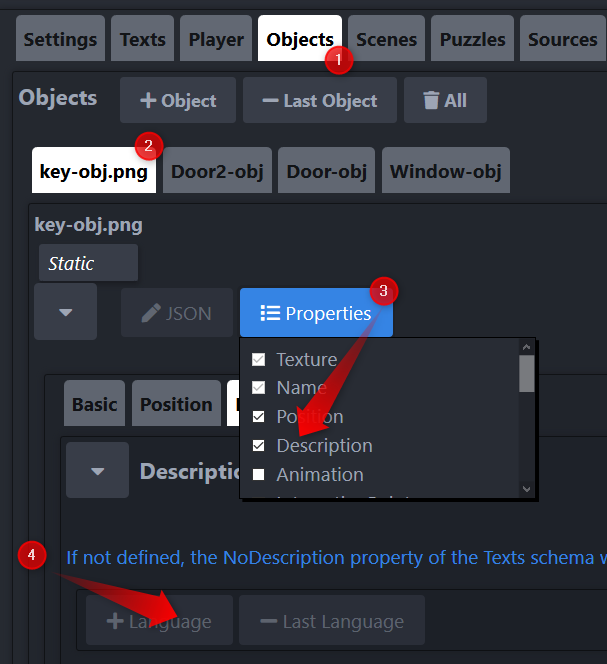
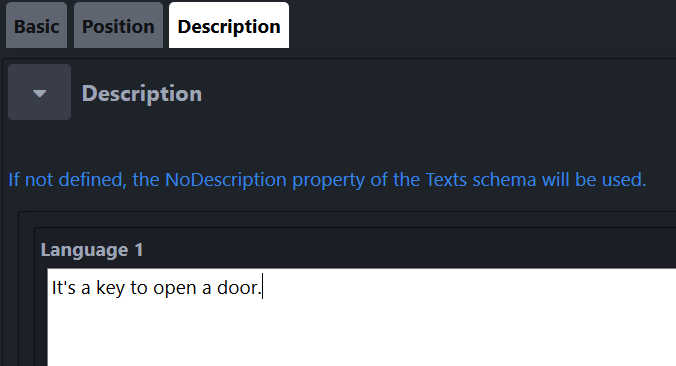
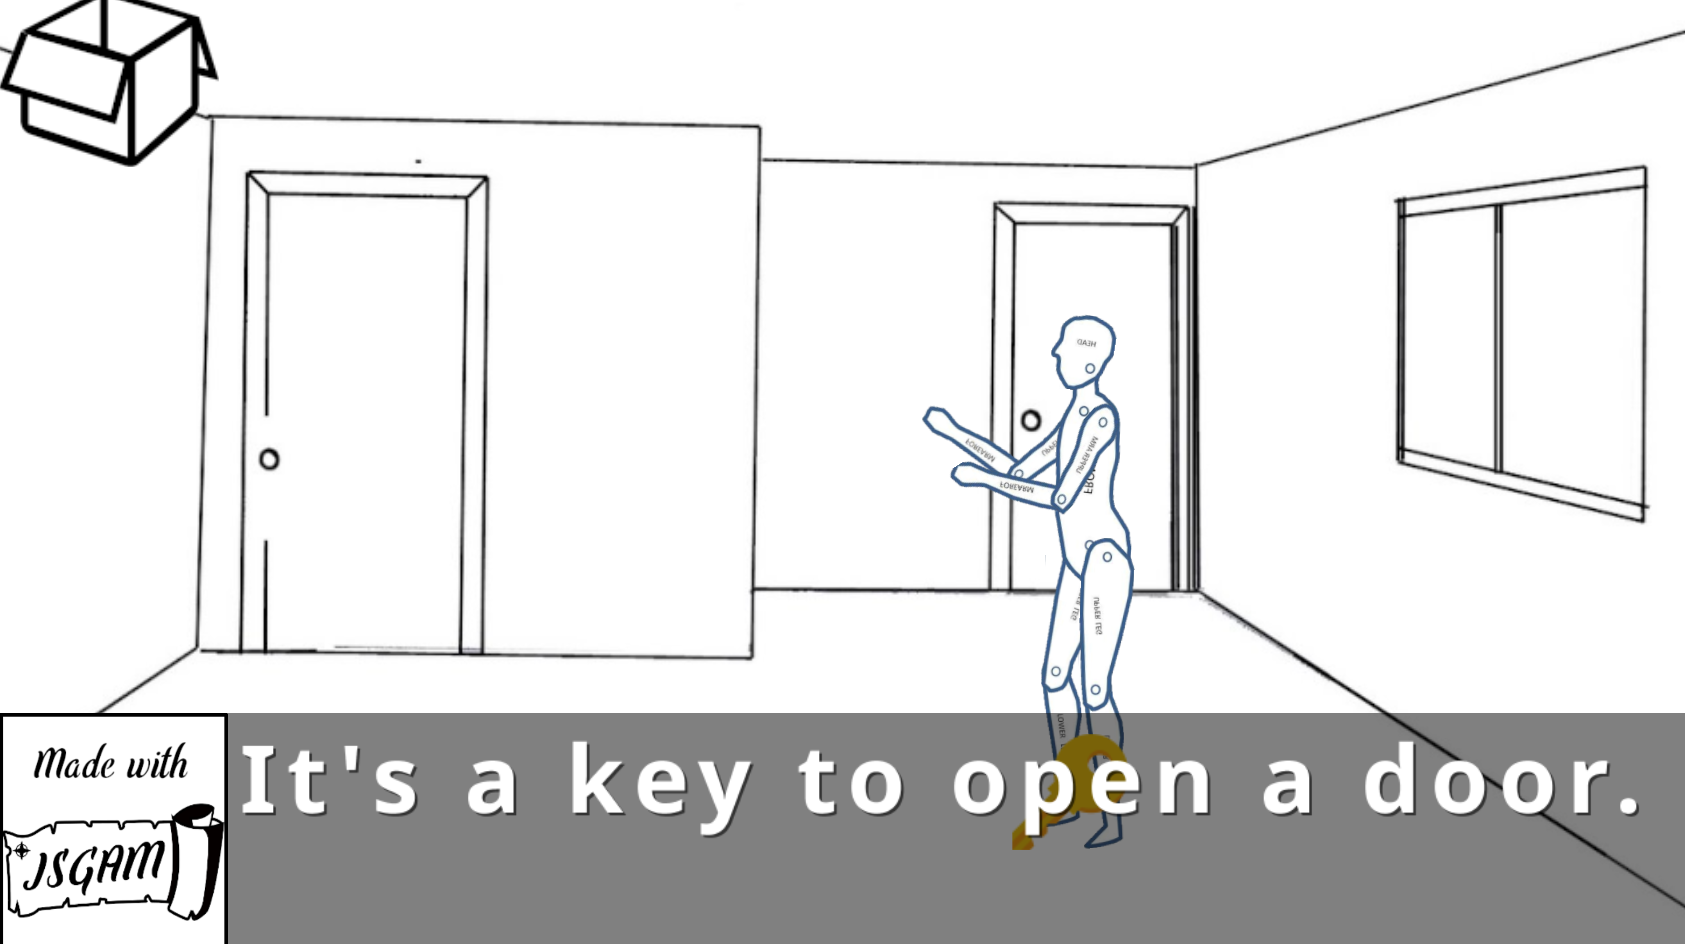
Let's add a description to our objects.
Repeat the same action for the window and the doors. Let's save the adventure and try again
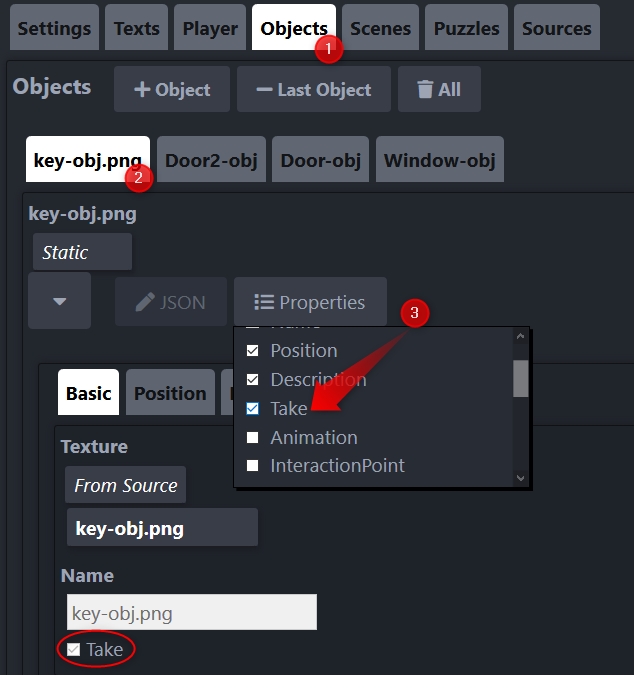
Also we are going to make possible to take the key.
Save the adventure and overwrite the game.json.
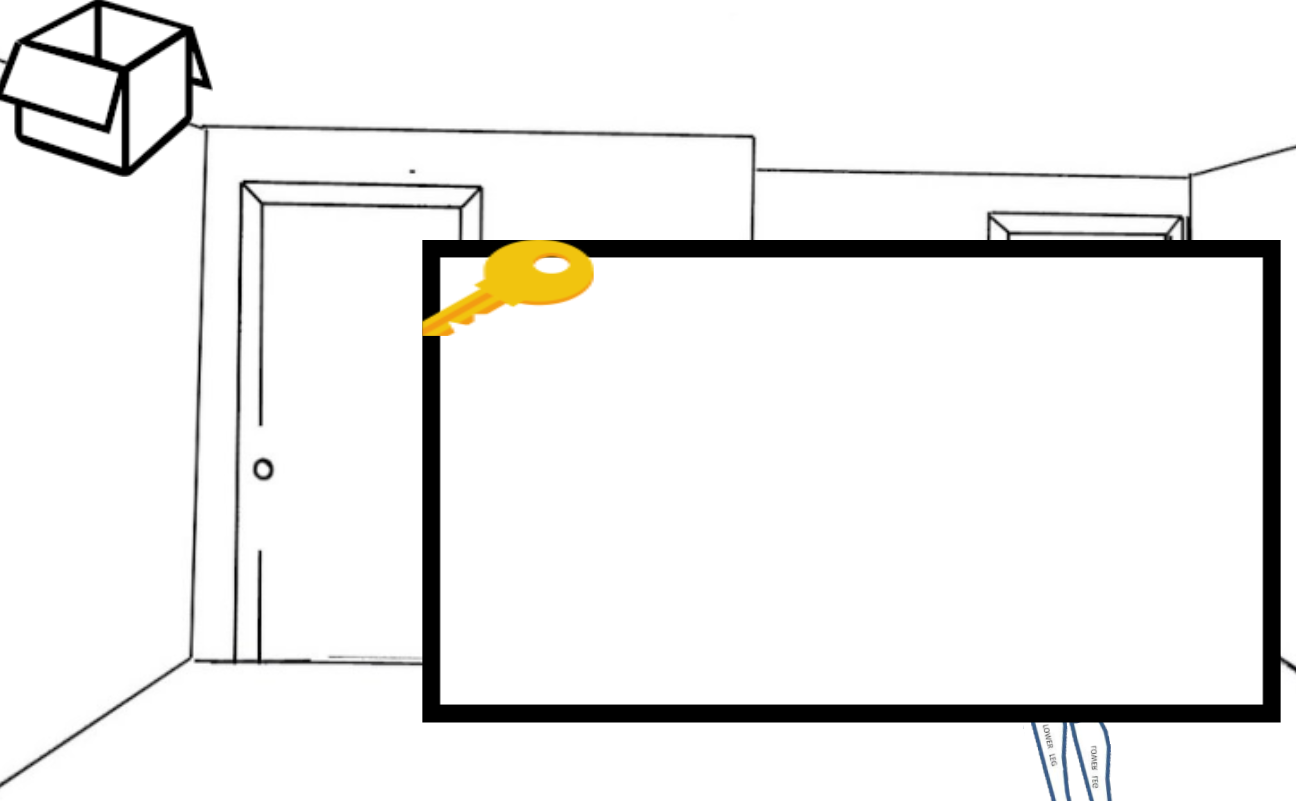
Now we get a better result. Drag and drop the key on the inventory icon to test we can take the key.
Puzzles
Puzzles are the game events, in our example we are going to open the door with the key and when we open that door the game ends (not a very difficult puzzle, but it's just an example).
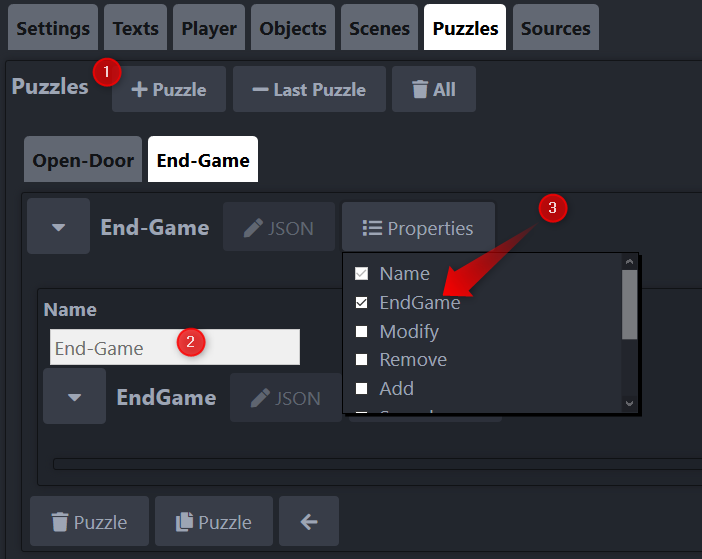
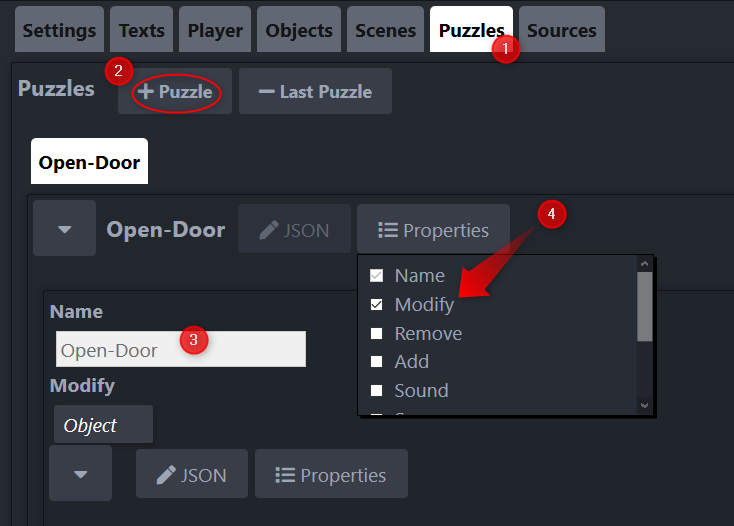
First we create a puzzle called End-Game, go to the Puzzles tab, click on +Puzzle, Properties and check the EndGame option.
Now we create another puzzle called Open-Door and add the property Modify (we can modify objects, characters, the player and scenes),
in our case we are going to modify an object, so we select Object.
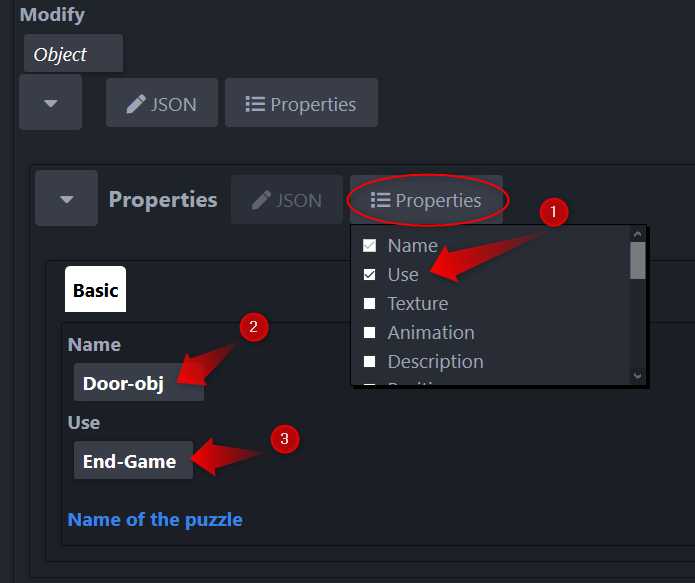
Select the Object we want to modify (2) add the Use property (1) and finally choose the puzzle to resolve when we use that object (3).
Basically we are telling to the game engine to finish the game when the player use the door.
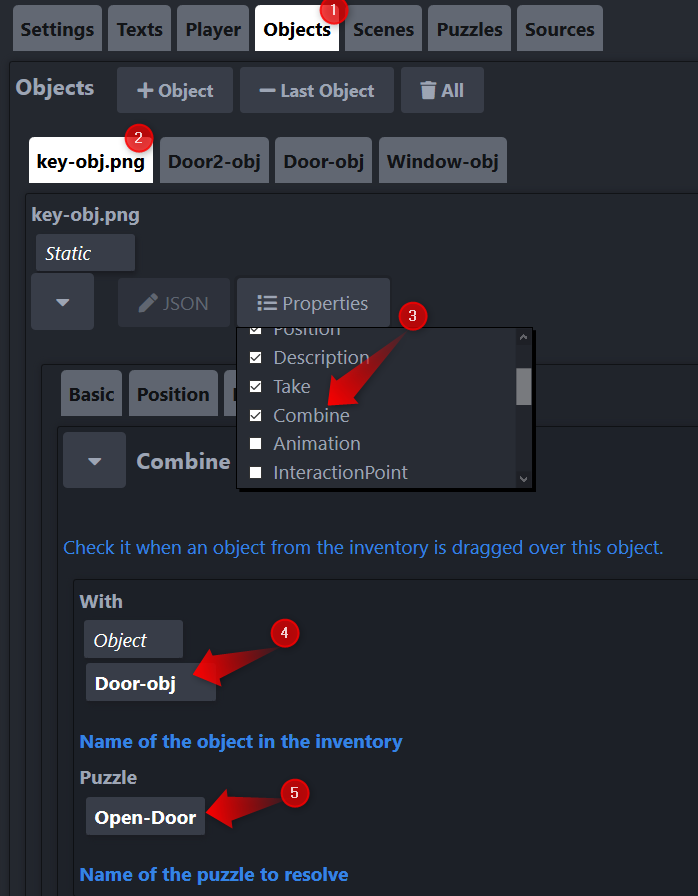
Now we need to tell the engine when we combinethe key with the door to resolve the puzzle
We select the key object (1)(2), add the Combine property(3), with the object Door-obj(4) and resolve the puzzle "Open-Door"(5).
Save the adventure and test.
Export
Save or Export the adventure?
- Save: saves the adventure and the sources data, this file can be used in the game and to load the adventure with the editor.
Use this option to develop the game.
- Export: saves the adventure, remove the sources data and minify.This file can be used in the game but not to load with the editor.
Use this option to distribute the game.
When you export the adventure you get a file with the extension .min.json, make sure to change it in the index.js.
Congratulations
You made your first adventure with JSGAM.
Next steps?
Inspect the editor properties to know what you can do with puzzles, add cutscenes to your game, other characters, dialogues, music and sounds.
A good way to continue this tutorial is to download The Wizard and The Squirrel game and load it in the editor.
The Wizard and The Squirrel
A wizard gets in troubles when his book of spells disappears...
Play Now
Source


